Fog is one of those conditions that is great to witness but difficult to predict.
A valley may fill while a nearby ridge stays clear. A river bend may hold mist for half an hour, then
lose it as soon as the wind picks up.
This guide shows how to create a practical PhotoSignal fog alert using the "Fog possible" Smart Check, a
location-specific timing window, and optional extra limits for the way you shoot. For more background on fog
patterns, see Fog Alerts for Landscape Photography.
What PhotoSignal is tracking
A good fog alert is not just "humidity is high". PhotoSignal's "Fog possible" Smart Check looks for a pattern
that may support fog or mist, including signals such as humidity, temperature, dew point, visibility, wind, and
the type of weather in the forecast.
When using a regular weather app, many would just look at the "weather code" it provides. We look beyond the
code.
Fog possible: the Smart Check that looks for fog-friendly forecast patterns.
Timing: fog is often most useful around sunrise or early morning, before the sun and wind
break
it up.
Optional limits: You don't need to add any additional weather parameters (Humidity,
Temperature, Wind, etc) - because they are
included in the calculation behind the scenes.
Local judgement: terrain, water, elevation, and recent rain still matter. Treat the alert
as a possibility signal, not a guarantee.
Weather models can disagree: calculations are based on the data provided, and sometimes the
models disagree. Multi-model agreement for the fog, in particular, is on the roadmap.
How to create the alert
Open the location you want to watch.
Choose a saved location where fog would actually help the photograph: a valley, forest, river, waterfall,
lake, wetland, or sheltered lookout. A fog alert is most useful when it is tied to a place with known fog
behaviour.
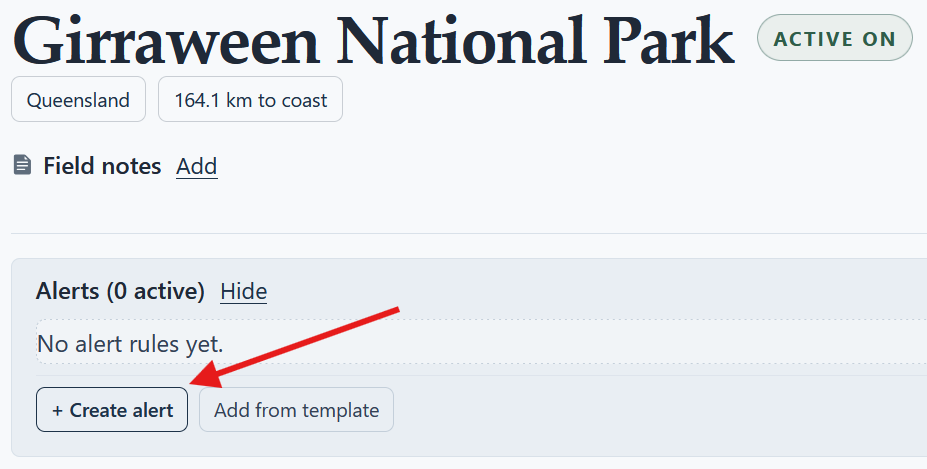
Create a new alert.
Click Create Alert and give it a clear name, such as "Foggy morning" or "Valley fog near sunrise".
Start from a saved location, then create an alert for the fog conditions you want PhotoSignal to
watch.
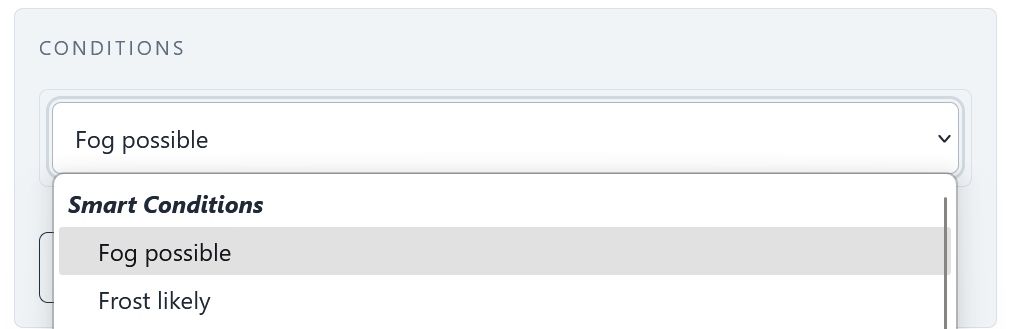
Add the Fog possible Smart Check.
Add the "Fog possible" Smart Check as the main condition. This is usually a better starting point than
trying to build a fog rule from one humidity or visibility threshold.
Select "Fog possible" from the smart conditions list.
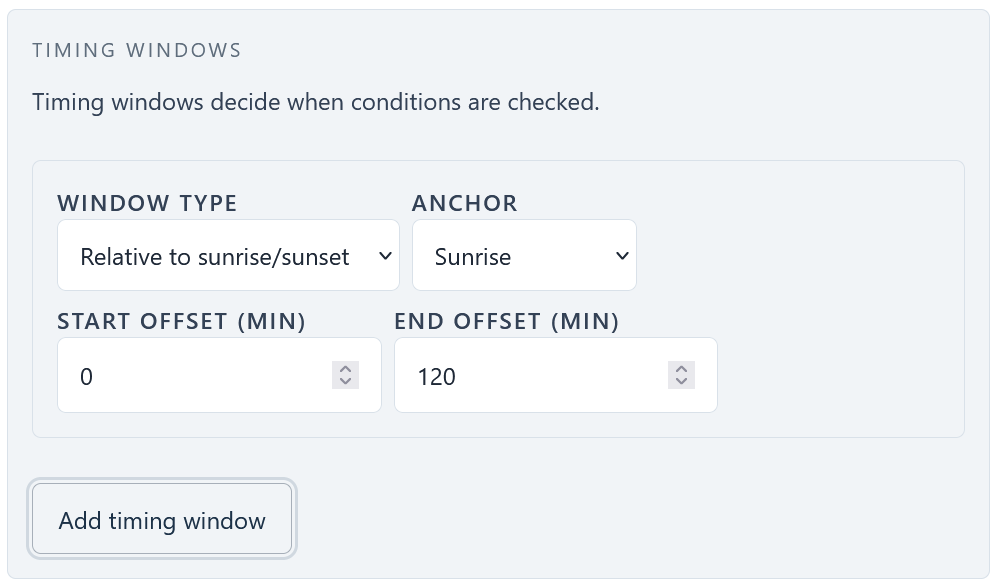
Set a useful timing window.
For most landscape fog alerts, start with a sunrise or early-morning window. A common first version is a
window right after sunrise, wide enough to catch fog after first light.
Select a sunrise anchor and set an offset from 0 to 120, meaning the timing window starts from
sunrise and
continues for 2 hours.
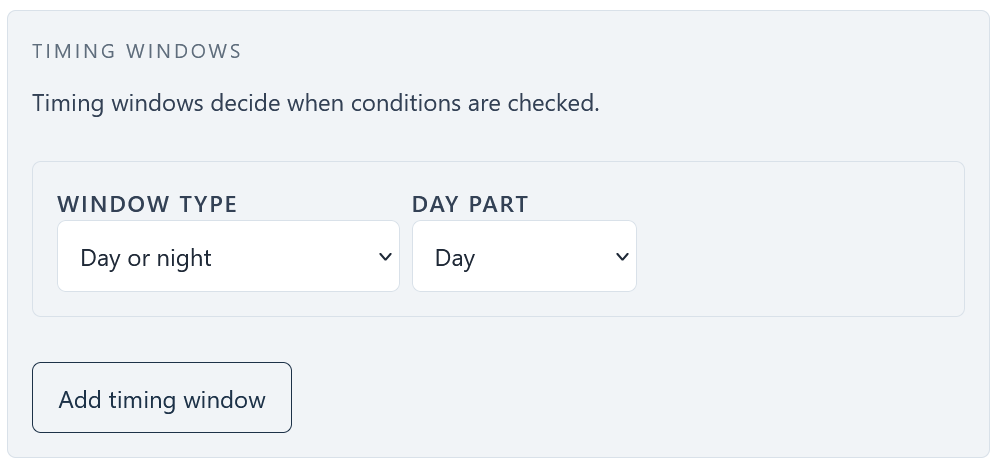
Another approach is to track the whole day for the fog possibility.
Select "Day/Night" and Day - it will adjust the timing based on sunrise/sunset timing each day.
Add optional limits only if they help.
If the alert is too broad for the location, add simple conditions such as Wind speed below your chosen
limit, Visibility below a useful distance, or Humidity above a useful percentage. Keep the first version
simple so you can learn how the location behaves.
Review notification behaviour.
Upcoming and imminent notifications can help with early starts. A cancellation can also save you from
chasing a forecast that no longer matches before you leave.
Save and tune after real results.
If the alert fires too often, narrow the timing window or add a stricter wind, visibility, or humidity
condition. If it rarely fires, widen the window or remove extra conditions that are making the rule too
brittle.
When to keep it simple
The "Fog possible" Smart Check is already doing the heavy lifting. In many places, the best first alert is just
that Smart Check plus a morning/day timing window. Add more conditions only when you know why they matter for
that
location.
Availability
The "Fog possible" Smart Check is available on all PhotoSignal plans. Paid plans can still be useful if you
want more saved locations, more alerts, or a longer alert history, but the core fog alert setup is not
restricted to paid users.
Conclusion
A useful fog alert starts with a real location, a sensible morning window, and the "Fog possible" Smart Check.
Keep the first version simple, then tune it around the places you actually photograph. PhotoSignal can do the
repeated checking, while you decide whether the signal is worth an early start.