Getting Started with PhotoSignal
PhotoSignal is built around a simple workflow: add the locations you care about, review the forecast context, create alerts for the conditions you want to watch, and receive notifications when a photography window may be worth checking.
1. Dashboard — your starting point
The dashboard is the first place to check when you open PhotoSignal. It gives you a quick overview of your saved locations, active alerts, upcoming opportunities, and recent notification activity.
Use the dashboard to see whether anything needs attention before drilling into a specific location. From there, you can open a location, review its forecast, check active alerts, or create new alerts.
2. Locations
Adding a location
Locations are the places PhotoSignal watches for you. Add the beaches, lookouts, forests, waterfalls, headlands, lakes, or other outdoor locations you regularly photograph.
- Navigate to the "Locations" section.
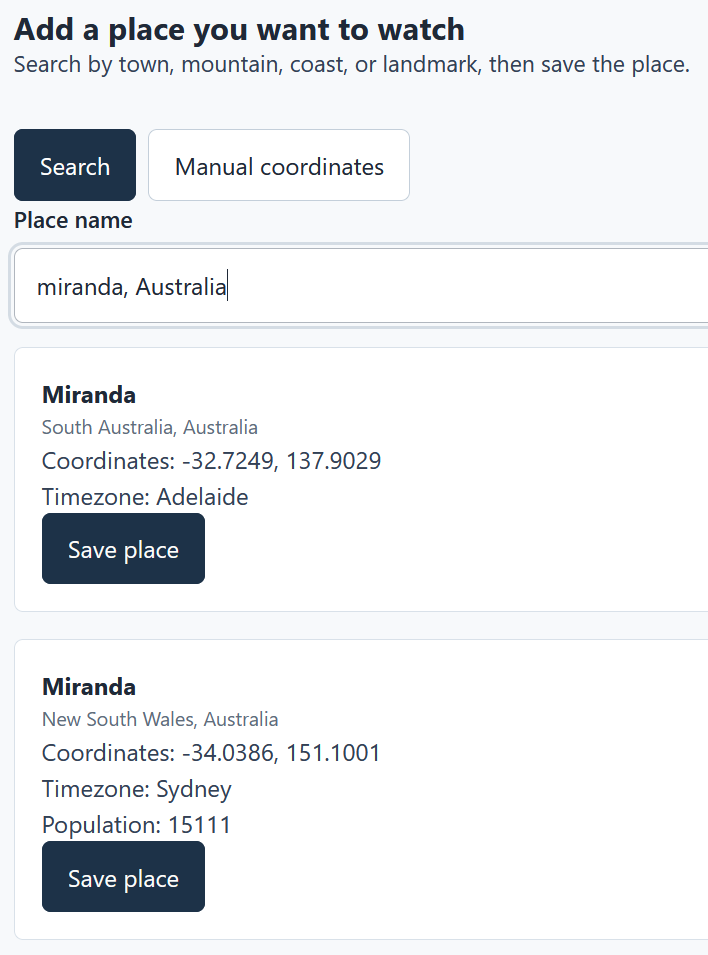
- Enter your location name and click Search.
- Select the correct location from the search results and click Save Place.
- If there are too many results, add a comma and additional location details to narrow the search. For example, "Miranda" returns too many results, so try "Miranda, Australia".
- If your location is not found, try using some nearby landmarks, or alternatively, switch to manual entry and use the coordinates.
Location summary and hourly forecast
Each location includes forecast information, such as weather, clouds, wind, rain, tides, waves, the moon, and other signals, where available. The summary helps you scan the current outlook, while the hourly view gives more detail.
Field notes
Use field notes to record your own knowledge: useful tide ranges, parking notes, seasonal behaviour, compositions, access issues, or anything else that helps you decide whether a location is worth watching.
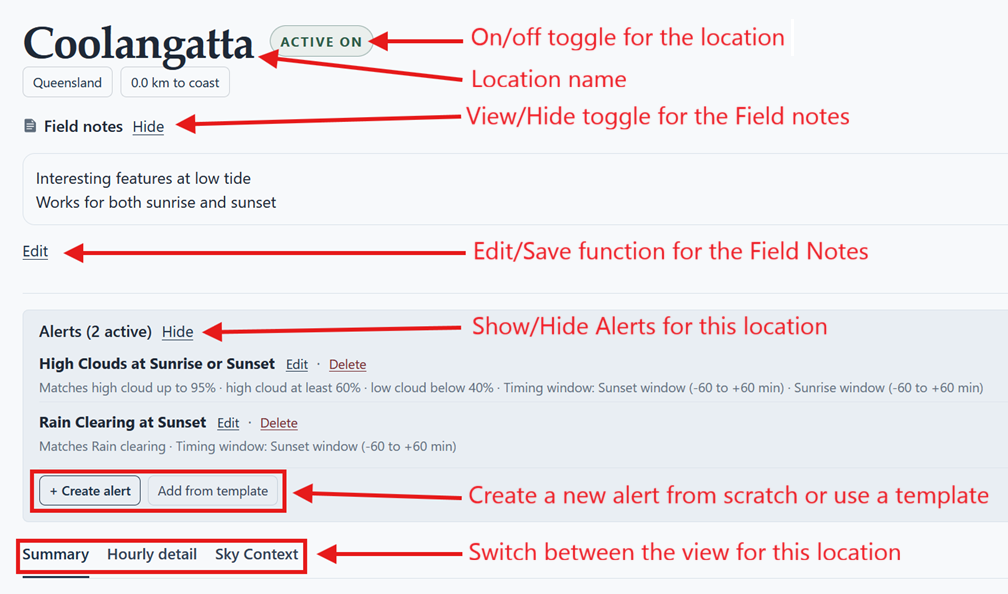
3. Adding alerts
Alerts are at the core of PhotoSignal. They tell PhotoSignal which conditions to monitor at your locations, and when to notify you. You can create custom alerts from scratch, use prebuilt templates, or save your own templates for reuse across locations.
An alert can include multiple conditions, such as high cloud, low wind, and a certain tide range. For an alert to trigger, all conditions must be met within the selected timing window.
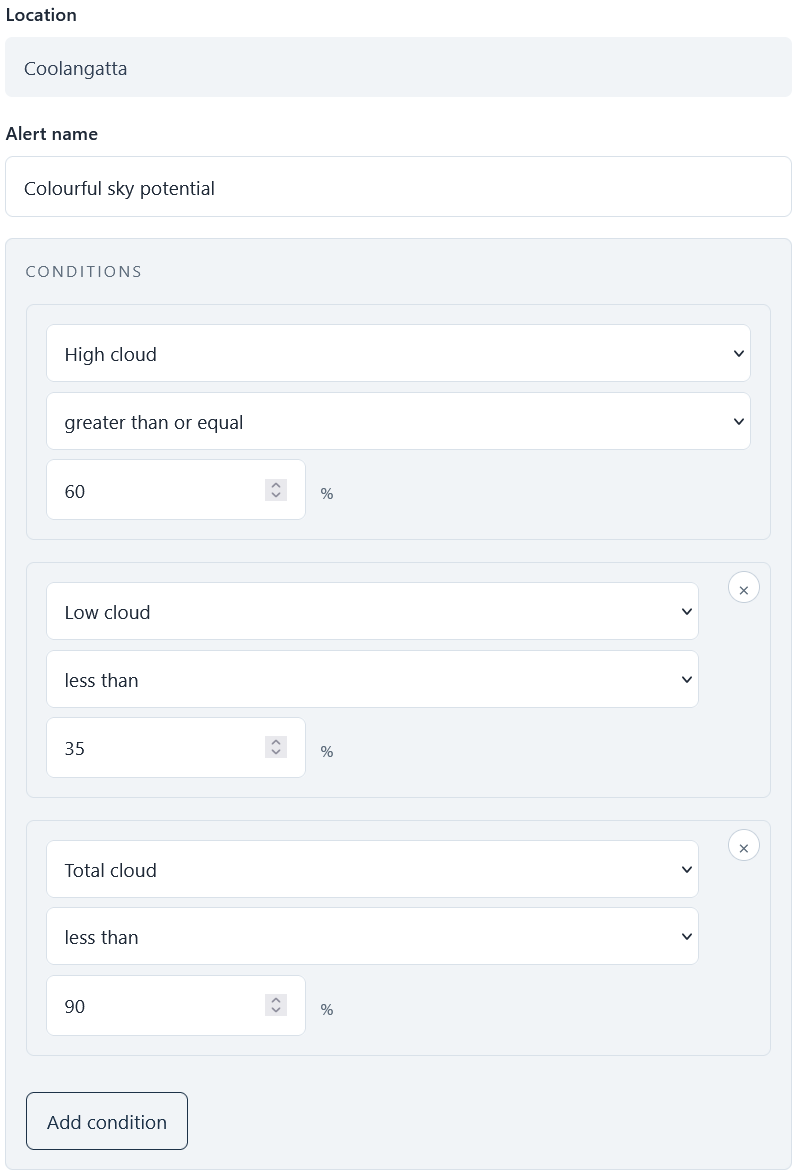
Create an alert from scratch
A custom alert lets you choose the conditions PhotoSignal should watch. You can combine forecast values such as cloud, wind, tide, rain, moon timing, and other signals, into a single rule for a saved location.
Timing windows
Timing windows tell PhotoSignal when to check an alert. For example, you might watch conditions around sunrise, sunset, moonrise, or a custom time window. As with alert conditions, you can combine multiple timing windows into a single alert. Do so by clicking the "Add Timing Window" button. This is useful when you want to watch for the same conditions around both sunrise and sunset, for example.
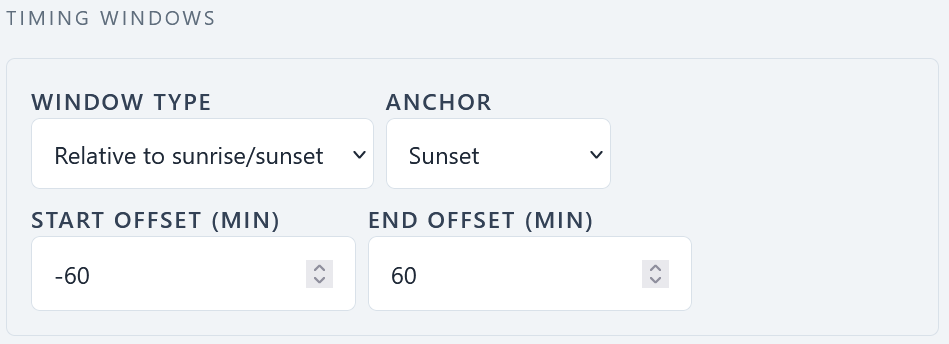
Available timing window types include:
- Around sunrise
- Around sunset
- Custom time range
- Day/Night
For the first three types, you specify an anchor time (sunrise, sunset, or a custom time) and a range around it. Day/Night timing windows are based on forecast signals for when it is day or night at the location.
Smart checks
Smart checks are prebuilt condition checks for common photography situations, such as fog possible, rain clearing, frost likely, or moonrise and moonset timing. They include prebuilt conditions and custom logic to check for the specific situation, which cannot be recreated with simple greater-than or less-than condition rules.
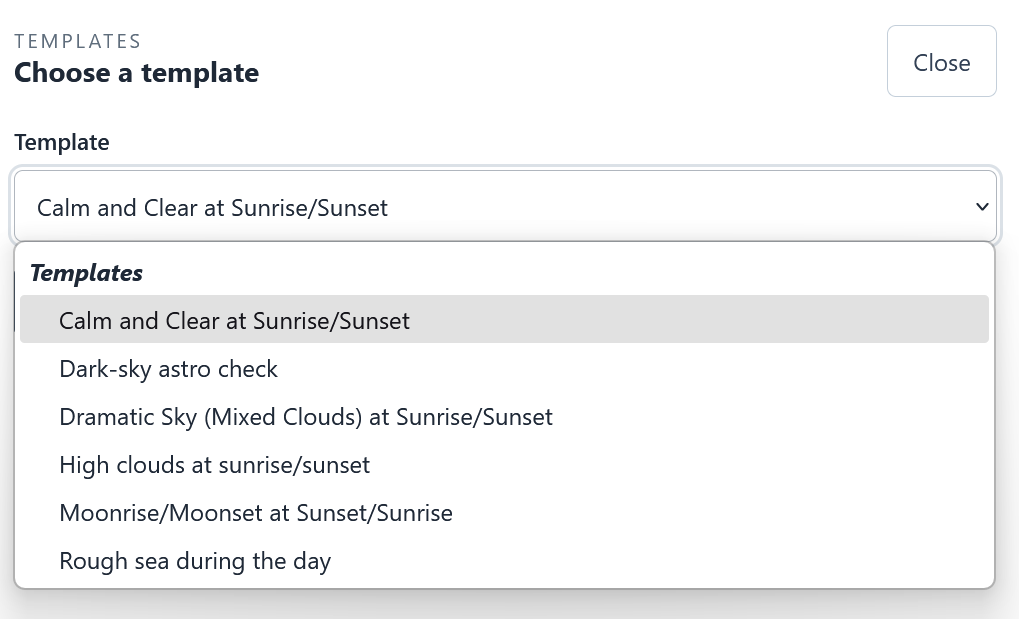
Use a prebuilt template
Templates give you a faster starting point for common alert types. You can apply a template to a location, then adjust the conditions and timing windows to suit your shooting style.
Create your own templates
If you build an alert setup that you want to reuse across multiple locations, save it as your own template. This is useful when you monitor similar conditions at several beaches, forests, lookouts, or coastal spots. You can do so in the Alert Rules tab.
4. Reviewing all alerts
The Alert Rules tab shows all your currently active alerts across all of your locations. Use it to review, edit, pause, or remove alerts as your planning changes.
5. Notifications
PhotoSignal can notify you when an alert window is about to appear, when it is about to appear, or when a previously promising forecast no longer matches. This helps you avoid manually checking every location. The Notifications section stores a history of your past notifications.
6. Account settings
Digest vs immediate notifications
Notification settings control how PhotoSignal sends alert information. Depending on your preference, you may want grouped summaries or more immediate alert updates. If digest mode is enabled, PhotoSignal waits for the selected digest delay, then sends a grouped summary of notifications received during that period. If digest mode is disabled, each notification is sent as it comes in.
Measurement units
Choose the measurement units that make sense for how you read forecasts, such as temperature, wind, distance, and other weather values.
Subscriptions
Your subscription, upgrade options, and billing portal links are available in the account settings.
7. Next steps
Once you understand the basic workflow, the next step is learning how to create useful alerts for real photography situations such as rain clearing, fog, tide, cloud, moon timing, sunrise, and sunset.